Step 1: Configuring Azure AD SAML/SSO/Federated Authentication for Snowflake
1) Log into your Azure Portal
2) Navigate to Microsoft Entra ID -> Enterprise Applications
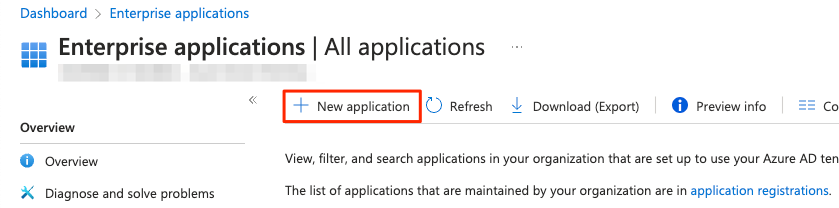
3) Click the New application button
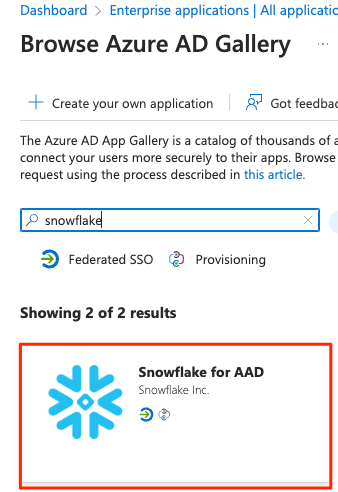
4) In the Browse Azure AD Gallery search bar, search for Snowflake, and choose the Snowflake for AAD application.
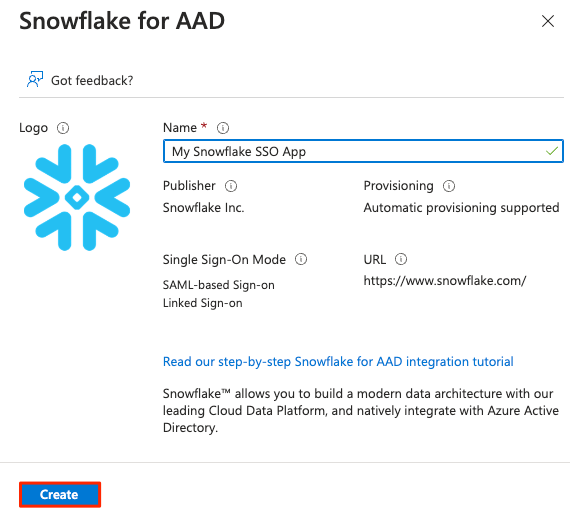
5) Give your Snowflake application a name, then click the Create button at the bottom
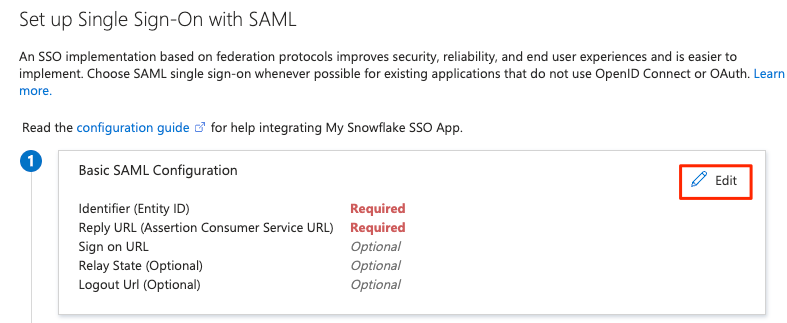
6) Once the application is created, on the left side choose Single sign-on, then choose SAML in the middle pane

7) In the middle pane under the Basic SAML configuration section, click the Edit button
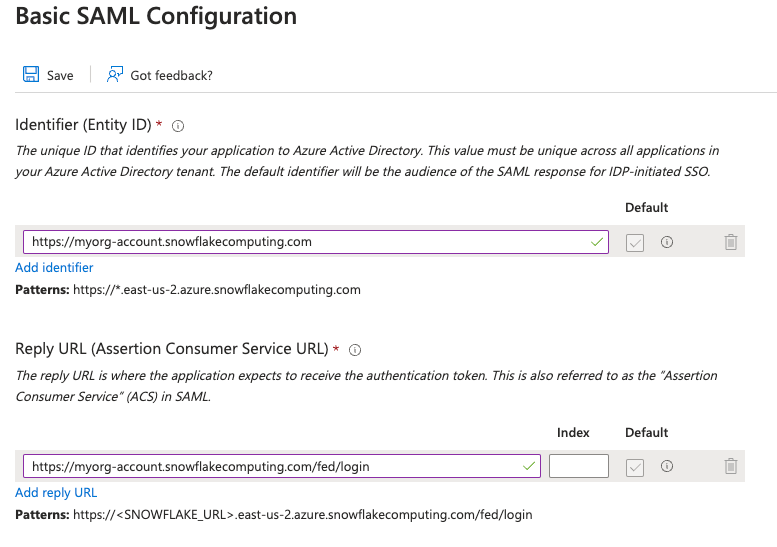
8) In the Basic SAML Configuration section, configure the Snowflake URL your users use to access your Snowflake account.
Refer to the Account Identifiers documentation for additional information.
You can choose either of the following:
| URL type | URL format |
|---|
| Regional | https://locator.region.snowflakecomputing.com |
| Organization | https://organization-name.snowflakecomputing.com |
| Connection | https://organization-connection.snowflakecomputing.com |
| Regional Privatelink | https://locator.region.privatelink.snowflakecomputing.com |
| Organization Privatelink | https://organization-name.privatelink.snowflakecomputing.com |
| Connection Privatelink | https://organization-connection.privatelink.snowflakecomputing.com |
For the sake of this example, we will use the organization-name account format.
a) In the Identifier (Entity ID), type the URL: https://organization-name.snowflakecomputing.com
b) In the Reply URL (Assertion Consumer Service URL), type https://organization-name.snowflakecomputing.com/fed/login
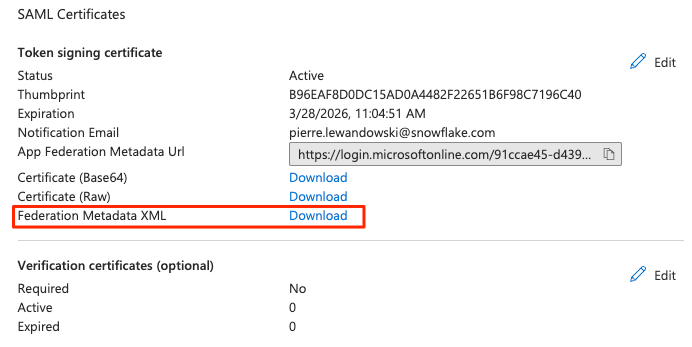
9) Back to the application's SAML-based Sign-on page, scroll down to the SAML Certificates section.
Click Download to download the Federation Metadata XML.
Step 2: Configuring Snowflake for SAML/SSO/Federated Authentication using Azure AD
To create a SAML2 integration with Azure AD in Snowflake, you should have previously collected the following information from the Azure AD Snowflake for AAD application:
- IdP Certificate
- Azure Issuer (Entity ID)
- IdP SSO URL
The above values can all be found in the XML Federation Metadata file, where:
- X509Certificate
- entityID in format https://sts.windows.net/[...]/ (include the trailing forward slash).
- Location in format https://login.microsoftonline.com/[...]/saml2
Reference Documentation: Create Security Integration
Use the role ACCOUNTADMIN to execute the required CREATE SECURITY INTEGRATION statement.
USE ROLE ACCOUNTADMIN;
CREATE SECURITY INTEGRATION AZUREADINTEGRATION
TYPE = SAML2
ENABLED = TRUE
SAML2_ISSUER = 'https://sts.windows.net/[...]]/'
SAML2_SSO_URL = 'https://login.microsoftonline.com/[...]/saml2'
SAML2_PROVIDER = 'CUSTOM'
SAML2_X509_CERT = '<Base64 encoded IdP certificate>'
SAML2_SP_INITIATED_LOGIN_PAGE_LABEL = 'AzureADSSO'
SAML2_ENABLE_SP_INITIATED = TRUE;
Where:
- SAML2_X509_CERT: Only include the certificate body, in one single line, wrapped in single quotes, without BEGIN or END tags.
- SAML2_SSO_URL: Login URL in the Azure portal (Location in the XML file)
- SAML2_PROVIDER: Accepted values are OKTA, ADFS or CUSTOM. Use CUSTOM when AzureAD is the IdP.
- SAML2_ISSUER: Azure AD Identifier value (EntityID)
Step 3: Adjust the Snowflake ACS and Issuer URLs according to those chosen in Step 1
By default, the SAML2_SNOWFLAKE_ACS_URL and SAML2_SNOWFLAKE_ISSUER_URL parameter values of your newly created Snowflake SAML2 security integration will take the Regional Locator URL format.
If you configured the Basic SAML configuration in Step 1 using the Regional Locator Snowflake URL, your SSO configuration is completed.
If you've chosen to use a different URL format such as Organization, Connection or one of the Privatelink URLs, follow the steps below.
1) Review the current integration configuration
DESC SECURITY INTEGRATION AZUREADINTEGRATION;
Confirm the values of the SAML2_SNOWFLAKE_ACS_URL and SAML_SNOWFLAKE_ISSUER_URL parameters are using the Regional Locator URL.
2) Alter the security integration for the values of SAML2_SNOWFLAKE_ACS_URL and SAML_SNOWFLAKE_ISSUER_URL to reflect the Azure application's Basic SAML configuration.
USE ROLE ACCOUNTADMIN;

ALTER SECURITY INTEGRATION AZUREADINTEGRATION SET SAML2_SNOWFLAKE_ACS_URL = 'https://<organization name>-<account name>.snowflakecomputing.com/fed/login';

ALTER SECURITY INTEGRATION AZUREADINTEGRATION SET SAML2_SNOWFLAKE_ISSUER_URL = 'https://<organization name>-<account name>.snowflakecomputing.com';
Notes:
- the above statement uses the Organization URL as an example. You should use the URL format the Azure Single sign on application was configured with.
- The value for the parameter SAML2_SNOWFLAKE_ACS_URL ends with /fed/login.
- The value for the parameter SAML2_SNOWFLAKE_ISSUER_URL is only the Snowflake account URL, in the format matching the Azure application configuration.